Head-Mounted Cameras
Significant Changes in LightBurn 2.1
LightBurn 2.1 introduced a new camera system, with new features, a new interface, and new calibration and alignment processes. Information from earlier versions of LightBurn may not apply in LightBurn 2.1, and information for working with cameras in LightBurn 2.1 may not apply to earlier versions.
Head-Mounted cameras are attached to a laser's head and travel with it as it moves around its work area. After properly Calibrating and Aligning your Head-Mounted camera, LightBurn will be able to stitch together captures taken by the camera at multiple locations in the work area, producing an Overlay for your Workspace that you can use to position graphics over material.
Before configuring your head-mounted camera, make sure the camera is securely mounted to your laser head, with no ability to move or wiggle as the laser jogs. Before use, make sure the camera's wires don't interfere with the laser's movement.
Open the Camera Alignment Wizard
There are a few ways to open the Camera Alignment Wizard outside of creating a new camera:
- Click the Alignment button for the camera you want to align in the Cameras Window.
- Click the Align to Workspace button in the Edit Camera window.
Before You Begin
- Add your camera to LightBurn.
- Calibrate your camera or import an existing Camera Lens Calibration from a LightBurn Camera File.
- Make sure your camera is mounted appropriately and wires are out of the way.
- Make sure you have laser-engravable material to burn the test pattern on. Choose a light-colored material that works well for engraving on your laser.
- Make sure you've tested the material you'll use and have cut settings ready for a high-contrast, crisp engraving. You can enter the settings manually, import from the Material Library, or use an existing layer in your current file.
- Place your material into the laser and focus the laser so you're ready to engrave.
Head-Mounted Camera Alignment
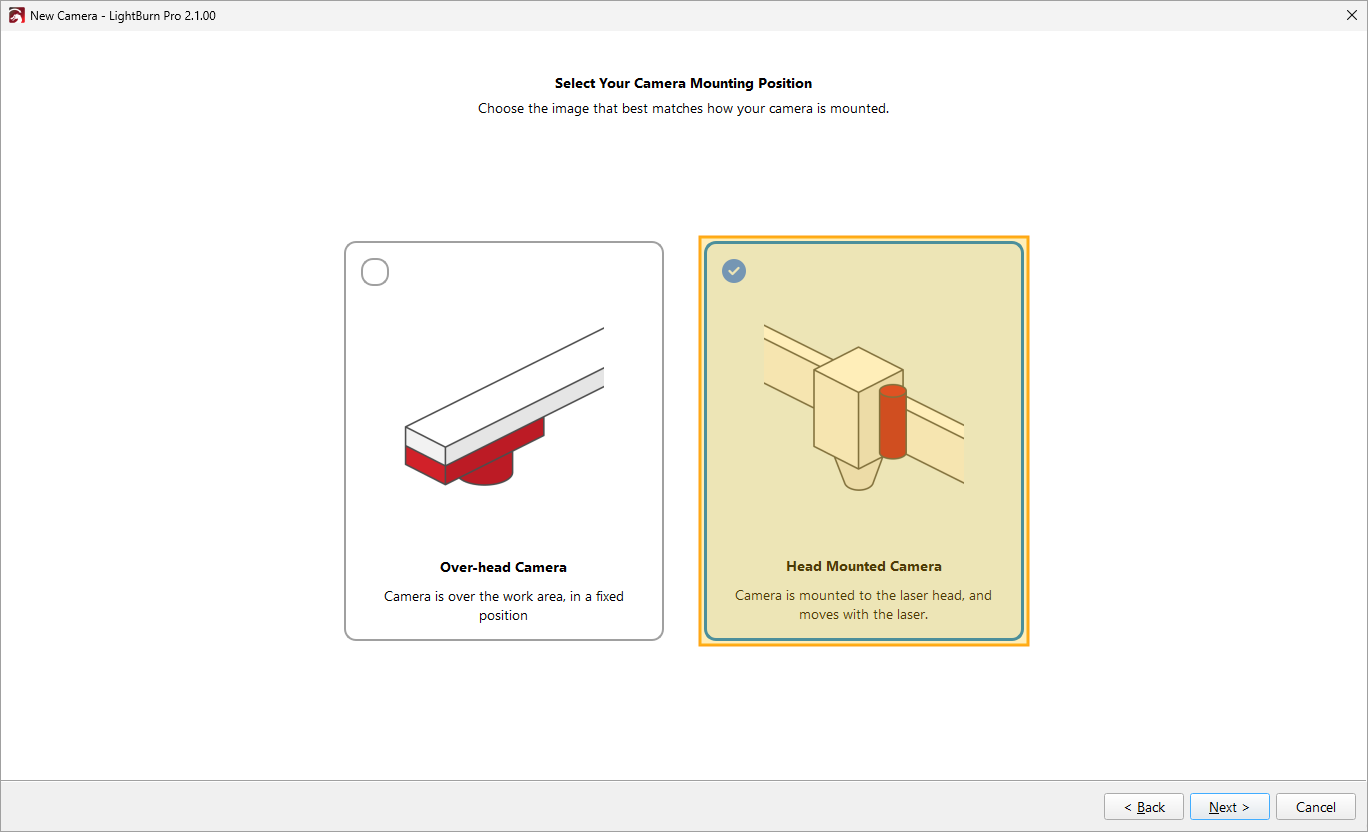
After calibration, when it's time to perform the Camera Workspace Alignment, choose the Head Mounted Camera option.
The Camera Alignment Wizard will walk you through the process, or you can continue reading for more detailed instructions. Click Next to continue to the next screen and select your alignment method.
1. Select Camera Alignment Method
You can use automatic or manual Camera Alignment. The automatic method is quicker and easier, but requires good lighting and high contrast between the marked pattern and the background material. Select the method you want to use and click Next. You'll see an overview of the process you've chosen. Click Next again to continue to set up your alignment pattern.
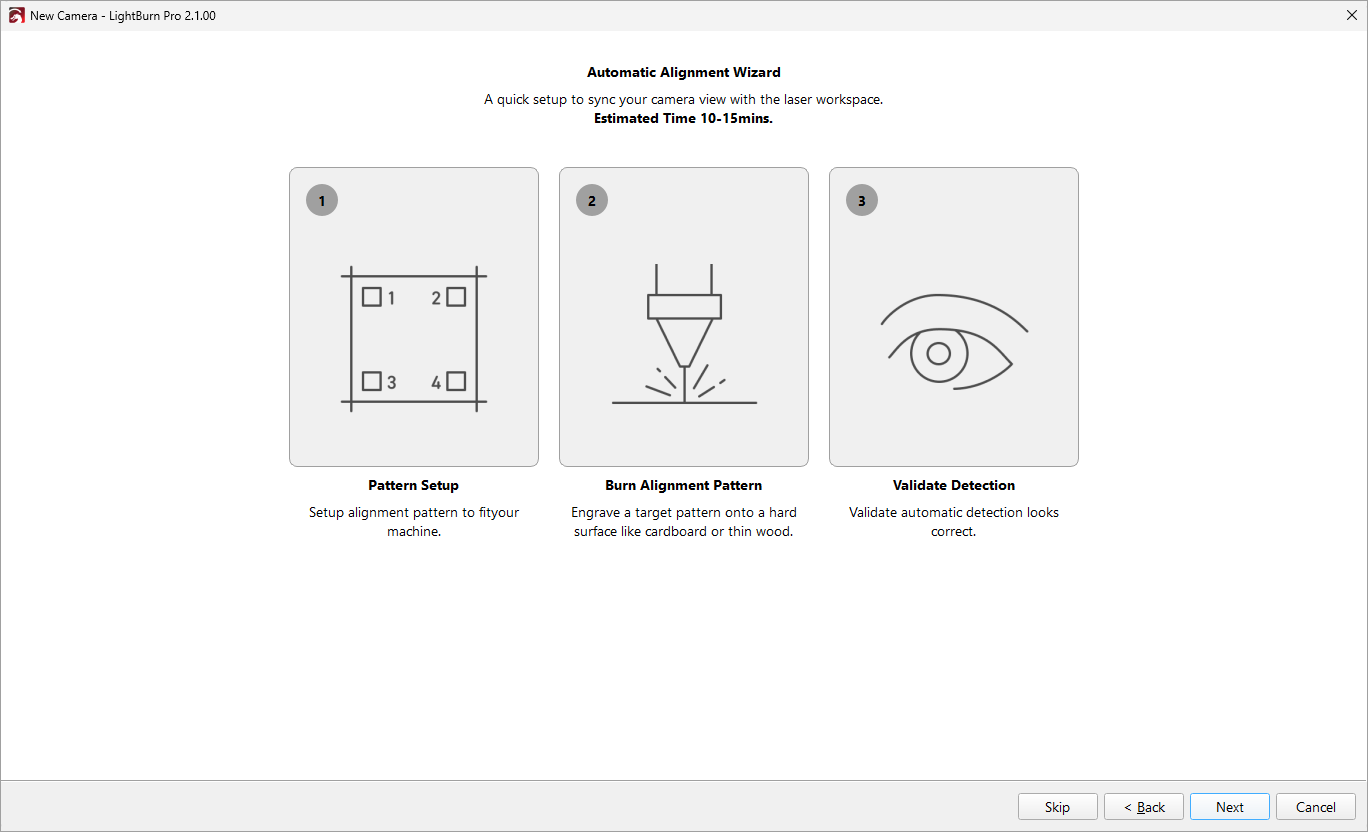
Overview screen for automatic alignment.
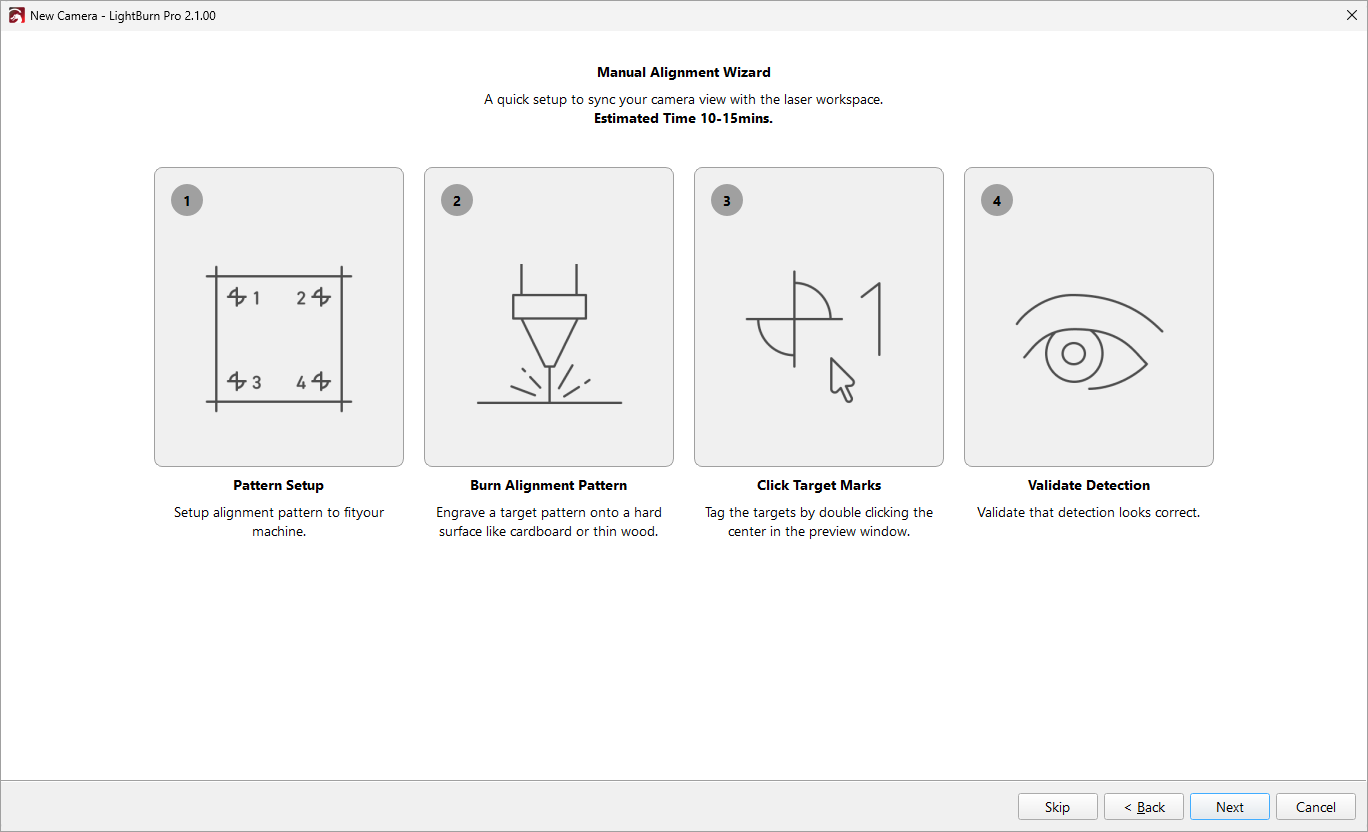
Overview screen for manual alignment.
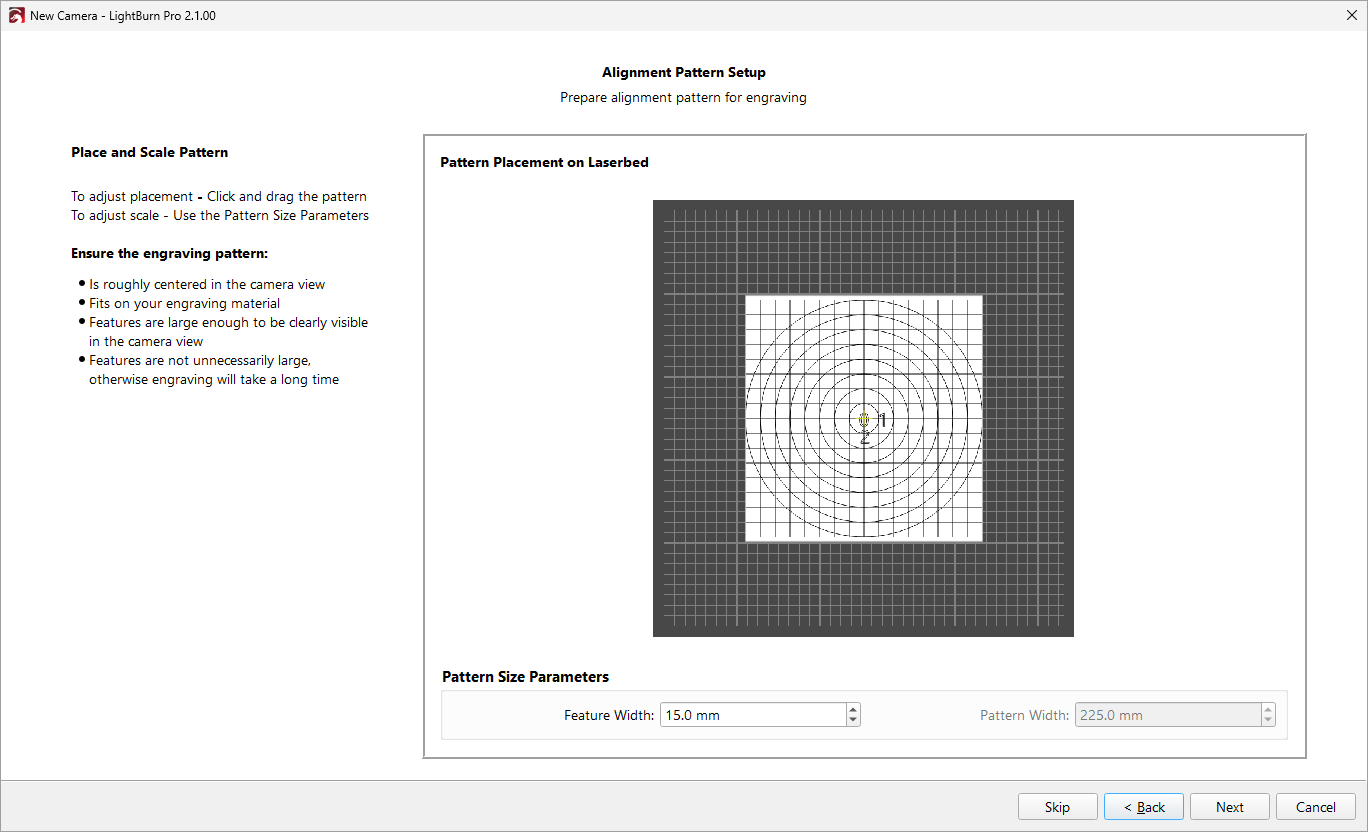
2. Alignment Pattern Setup
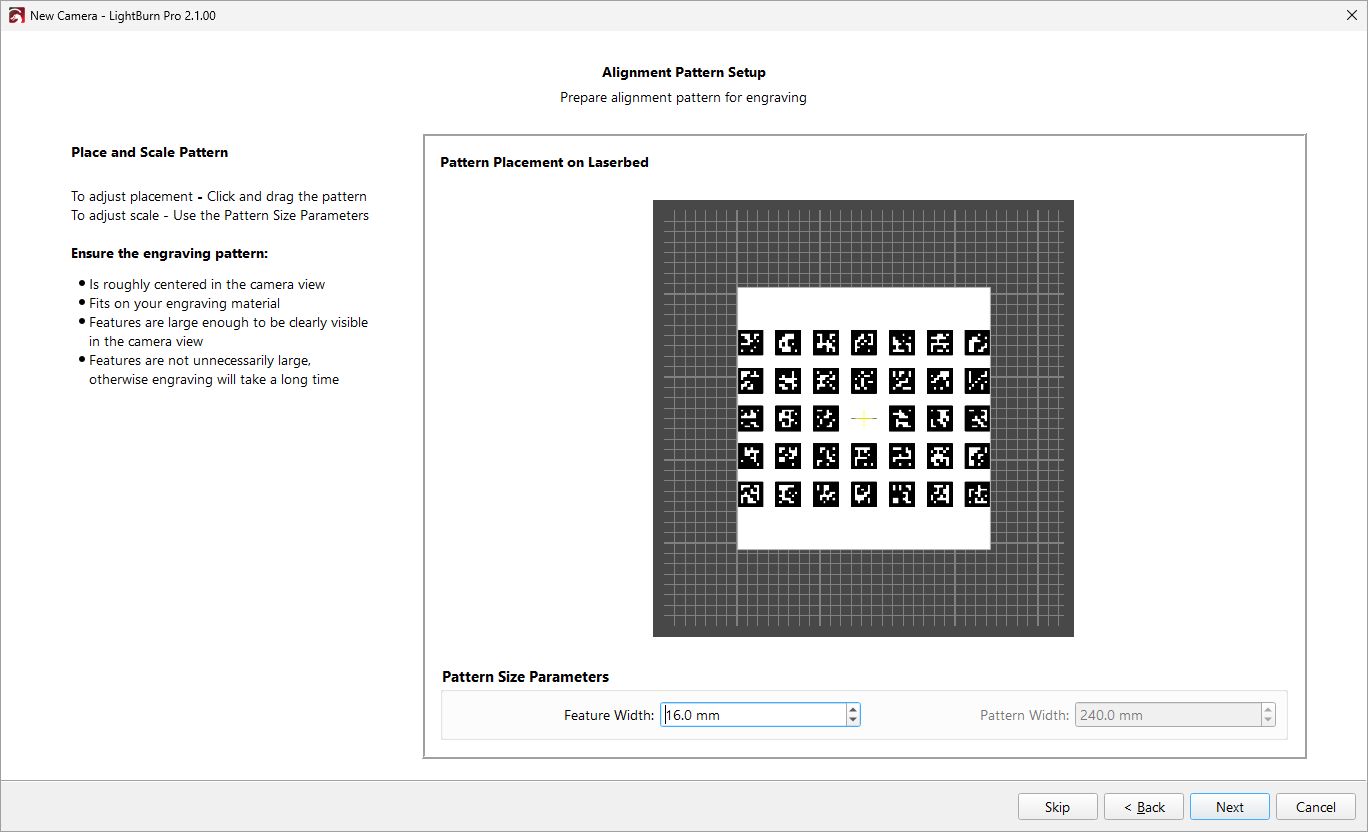
The automatic alignment process and the manual alignment process use different patterns, but the process is similar. Regardless of which pattern you're using, you can adjust the Feature Width under Pattern Size Parameters to adjust the size of the markings and the overall pattern size. The pattern should be:
- Roughly centered in the camera view.
- Sized to fit on your engraving material. Adjust the overall size by changing your Feature Width.
- Created with features large enough to be clearly visible in the camera, but not so large they take an excessively long time to engrave.
Automatic Alignment Pattern
The automatic alignment pattern uses AprilTags to allow LightBurn to automatically detect the position of the camera relative to the workspace.
Manual Alignment Pattern
The manual alignment pattern engraves a set of markers for you to identify, and uses them to guide you through aligning the camera to the workspace yourself.
3. Burn Alignment Pattern
This step is the same between automatic and manual alignment, even though the actual pattern is different. Place your material in the laser cutter, make sure it's focused, and get ready to burn the alignment pattern.

Use the camera preview to make sure the material is near the center of the image and clearly visible. Use Frame to make sure the pattern fits the material, and use Preview to see what will actually be burned. Use the Machine Control section in the lower left to move your laser head around if needed.
Adjust your cut settings to engrave a dark, crisp mark without cutting through the material. You can adjust your settings in a few ways:
- Adjust speed and power right in the Alignment Wizard window, just below Laser Settings.
- Click the Import button to load a layer from your Material Library.
- Click Settings to adjust your layer settings in the Cut Settings Editor.
Run the job using Start or Send, however you'd usually control your laser.
Do not move the pattern after you burn it, or you will need to burn a new alignment pattern.
4. Target Alignment
This process is different depending on whether you chose Automatic Alignment or Manual Alignment.
Automatic Target Alignment
Automatic Alignment uses the camera to read the AprilTags you've engraved.
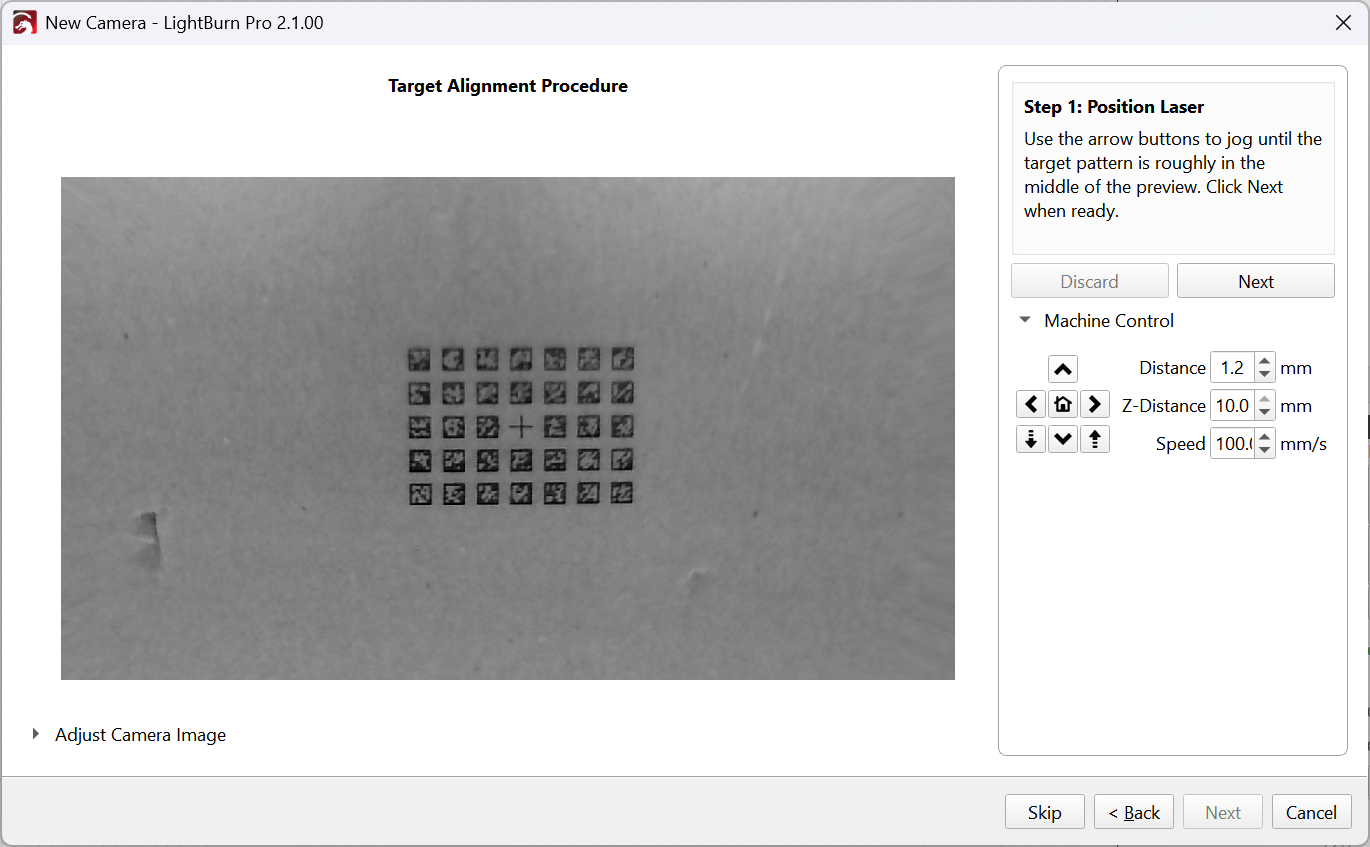
1. Position Laser
Start by using the arrow buttons to jog until the target pattern is roughly in the middle of the camera preview, then click Next.
2. Detect Tags
Adjust the camera image settings and lighting until at least 4 tags are recognized. Recognized tags are highlihgted in blue. If you jog the laser, LightBurn will reset the detection of the tags. Click Next to calculate the alignment.

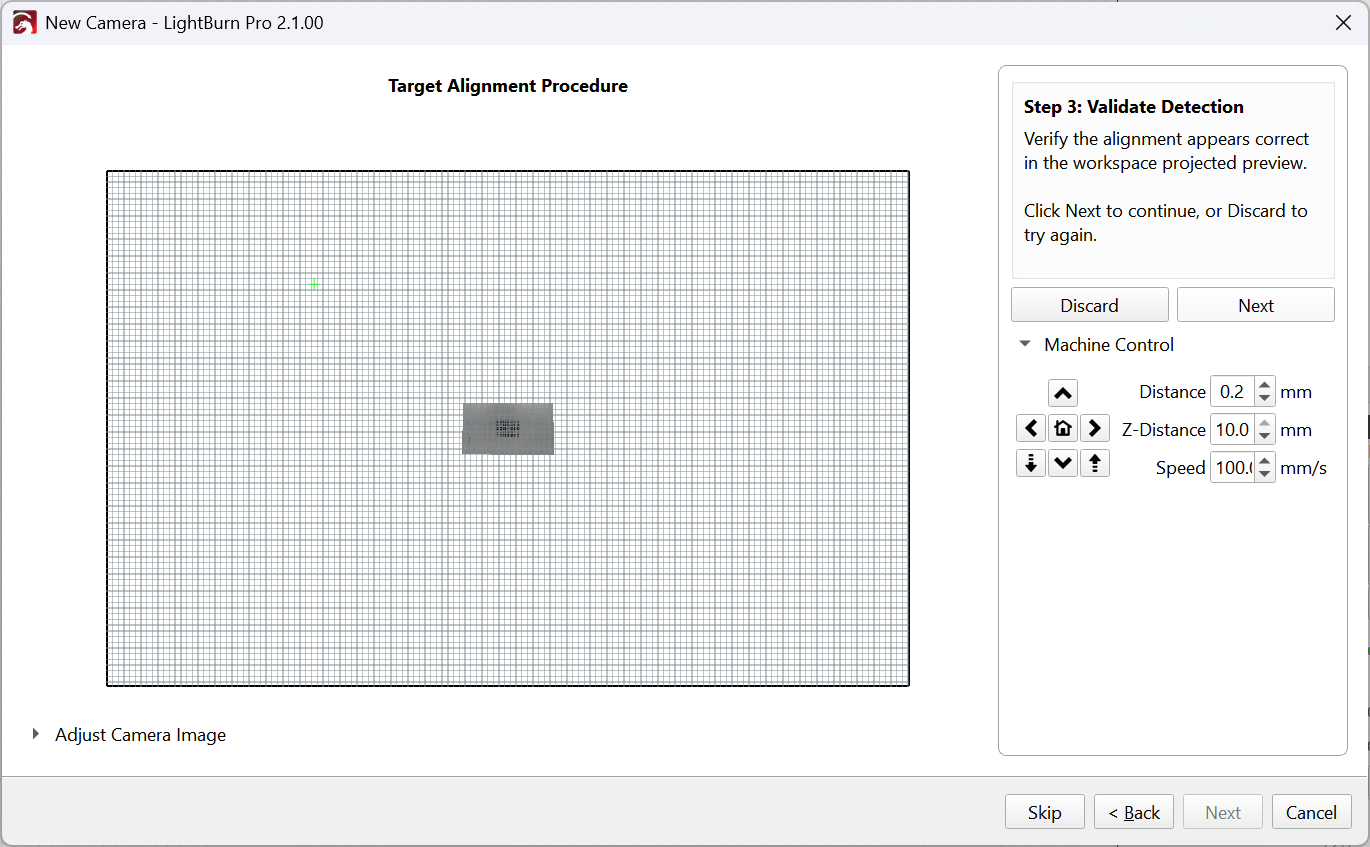
3. Validate Detection
Make sure the alignment appears correct in the projected camera preview. Click Next to continue, or Discard to try again.
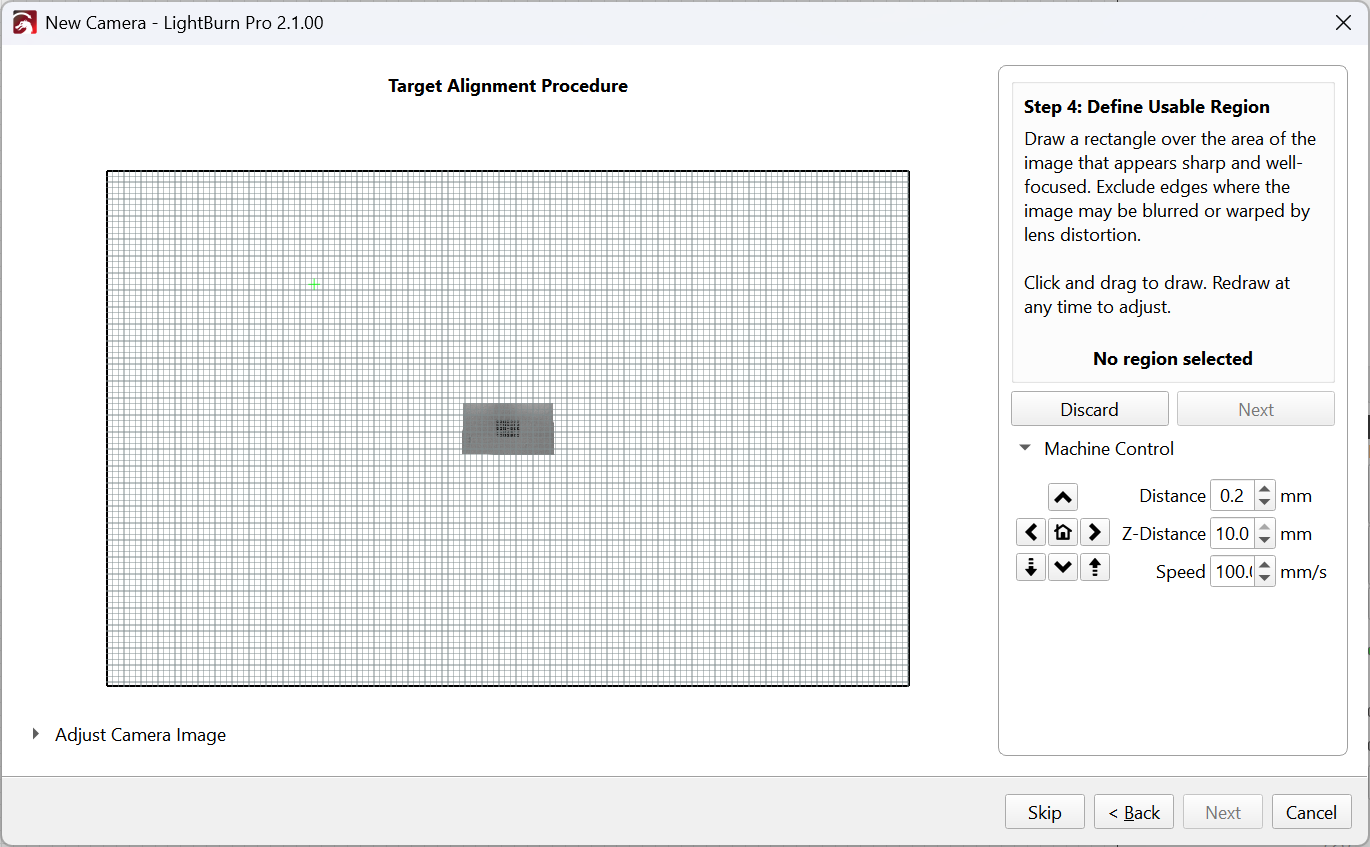
4. Define Usable Region
Click and drag to draw a rectangle over the portion of the image that appears sharp and well-focused. Leave out edges where the image is blurred or warped by lens distortion. You can redraw as much as you want to adjust this. Click Next to save the camera alignment, then Finish on the final screen.
Manual Target Alignment
Manual Target Alignment will walk you through identifying the centers of the targets you've engraved and identifying the portion of the camera's view that's clear and well-focused.
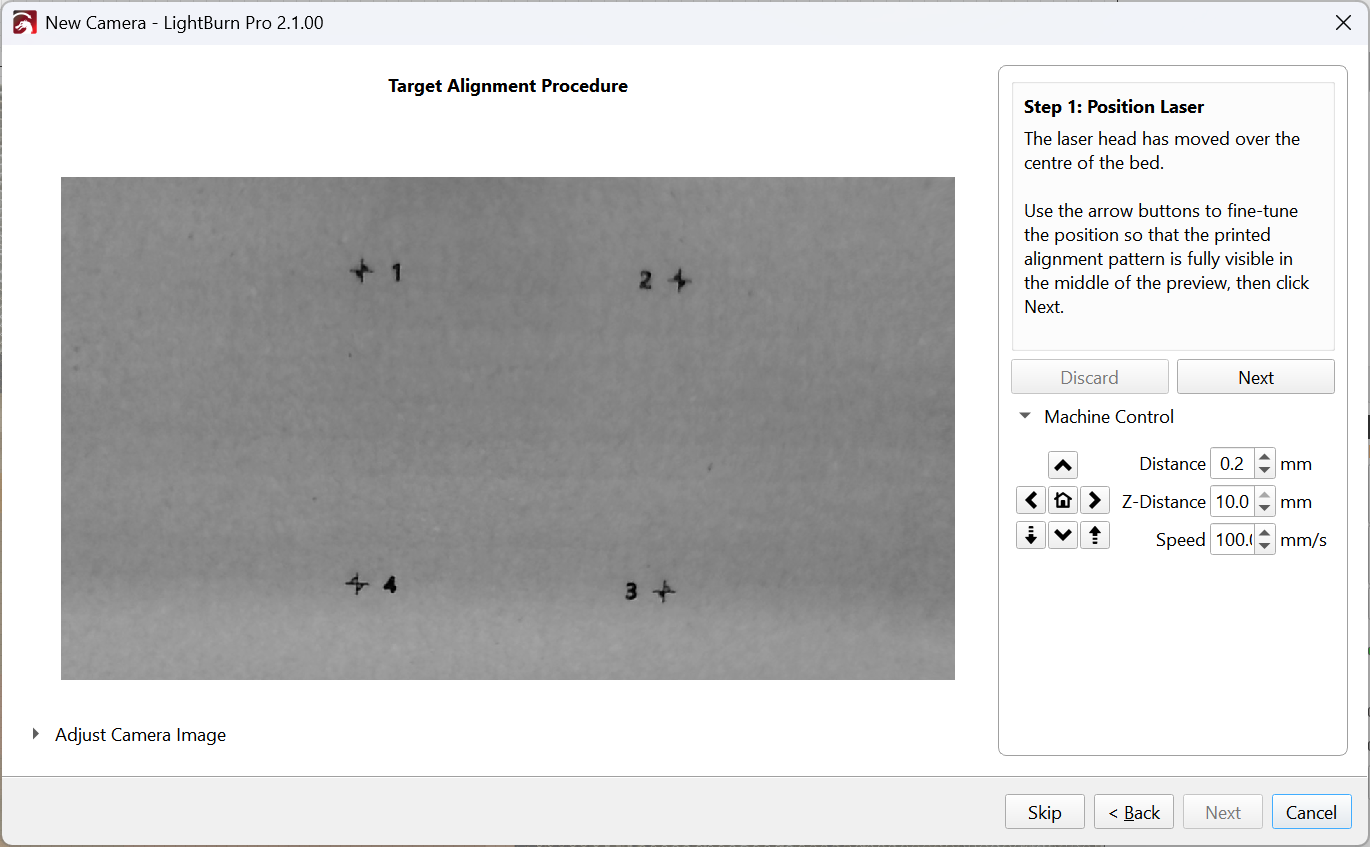
1. Position Laser
Start by using the arrow buttons to jog until the target pattern is roughly in the middle of the camera preview, then click Next.
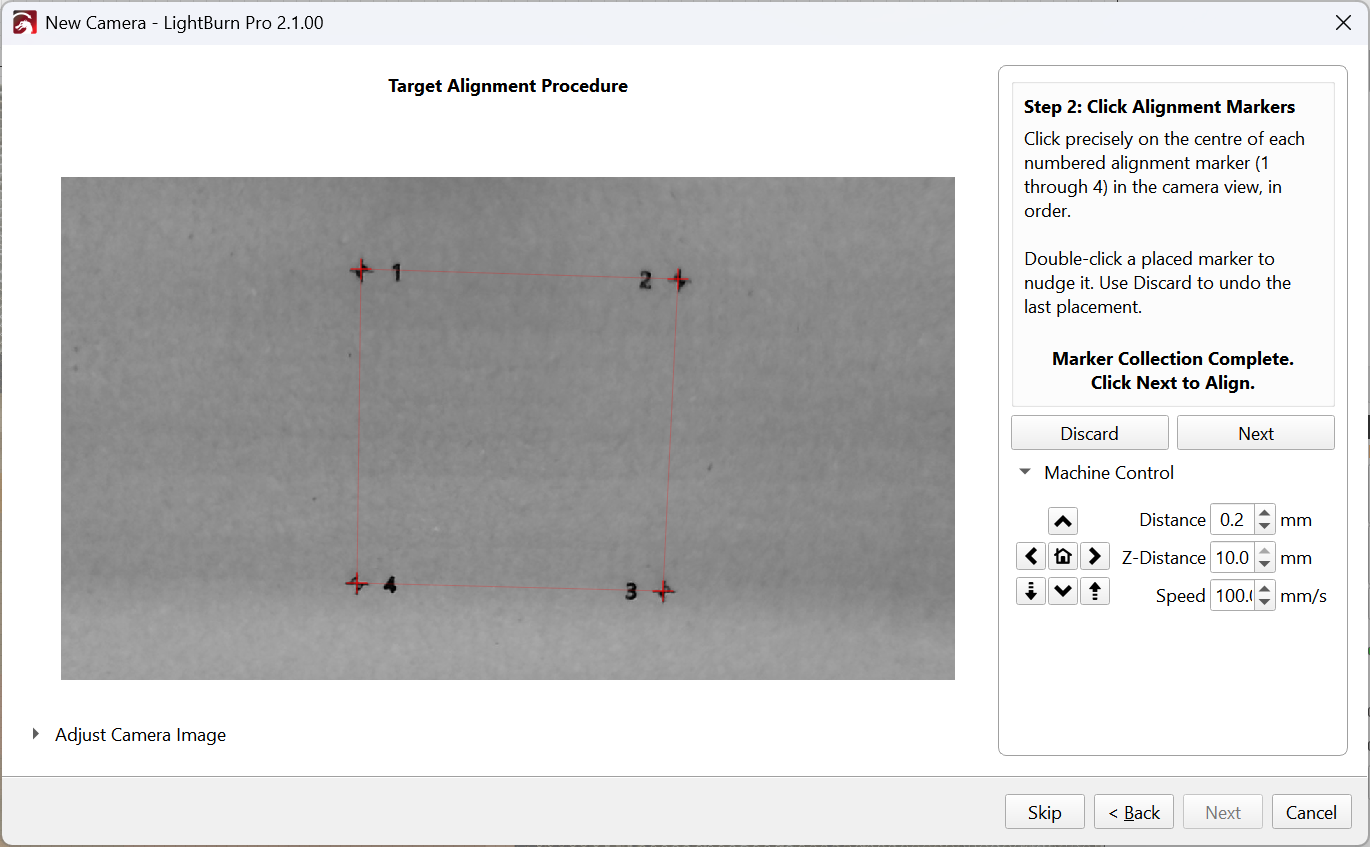
2. Click Alignment Markers
Click precisely on the center of each numbered alignment marker in order, as directed in the instructions. Double-click a placed marker to nudge it if you're slightly off, or click Discard to undo the last placement. When you've selected all four, a red box will connect all four markers. Click Next to continue and calculate the alignment.
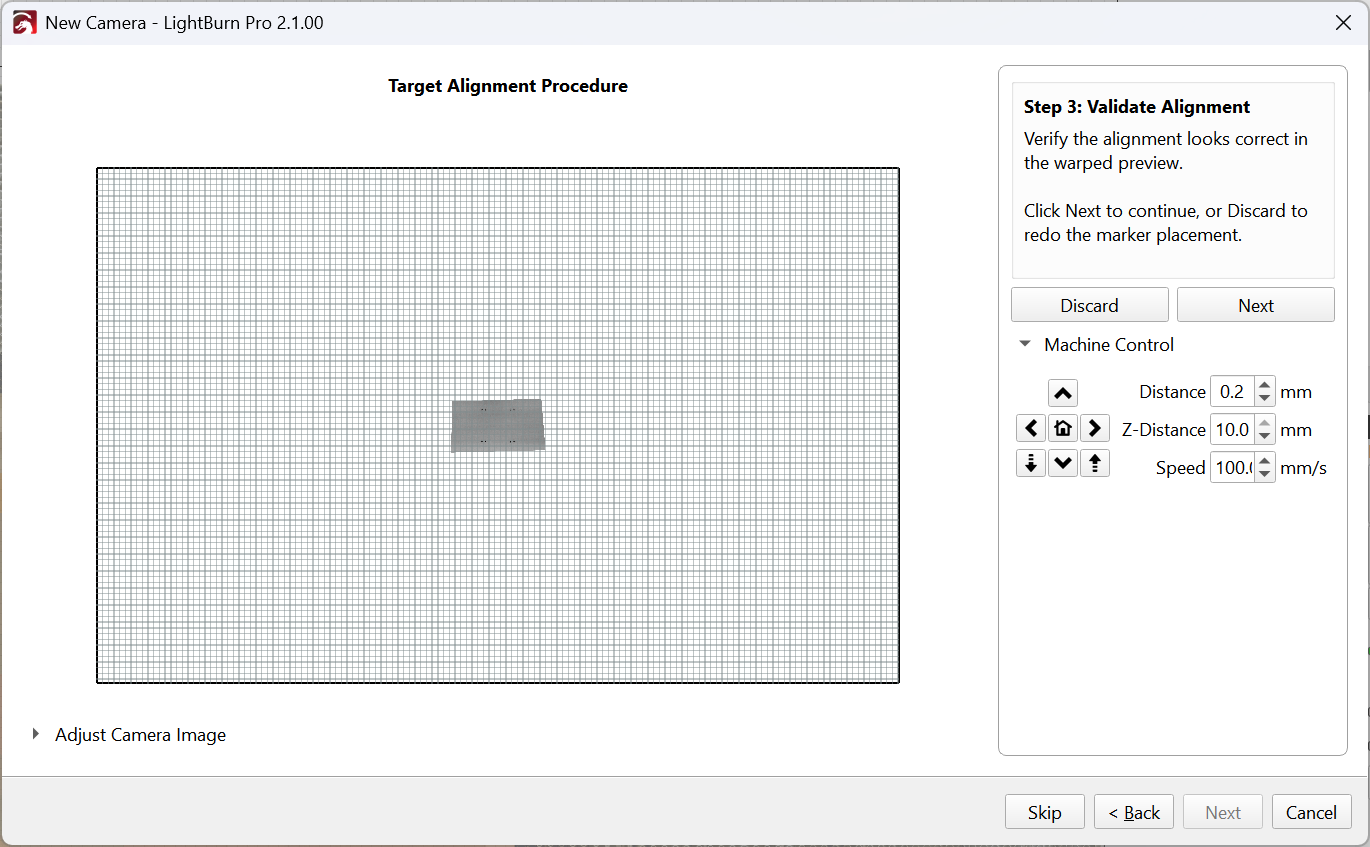
3. Validate Alignment
Make sure the alignment appears correct in the projected camera preview. Click Next to continue, or Discard to try again.
4. Define Usable Region
Click and drag to draw a rectangle over the portion of the image that appears sharp and well-focused. Leave out edges where the image is blurred or warped by lens distortion. You can redraw as much as you want to adjust this. Click Next to save the camera alignment, then Finish on the final screen.

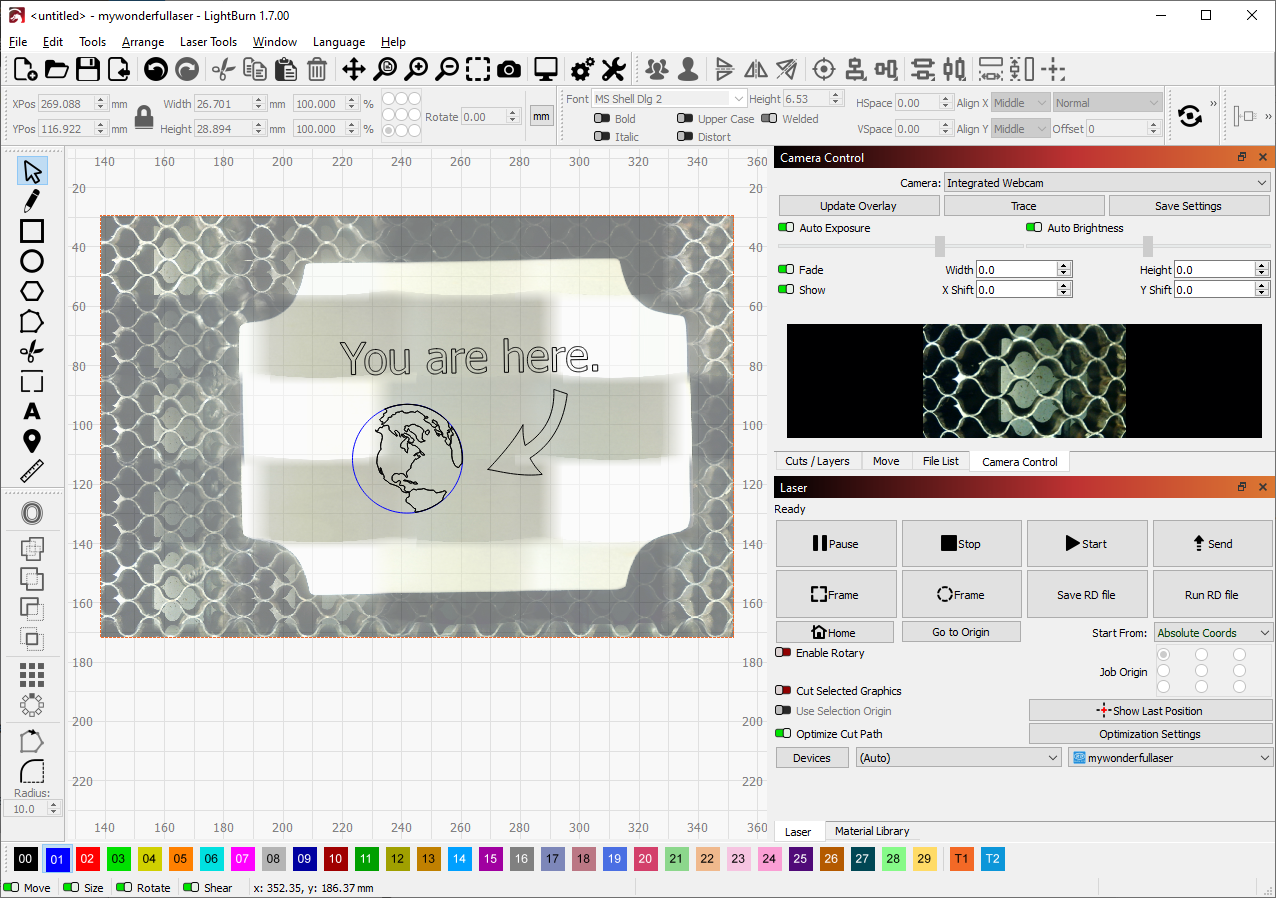
Capturing an Overlay
Click Update Overlay in the Cameras Window to command your laser to jog, pause, take a capture, and repeat, producing multiple images that LightBurn will stitch together to produce an Overlay.
-
If you have an object in your selection, the laser will jog to take captures of only the area within the selected object, and produce an Overlay confined to that area in your Workspace.
-
If you have nothing in your selection, the laser will jog to take captures of the entire work area and produce an Overlay that covers your entire Workspace.
Troubleshooting
- If the Overlay is misaligned, try rerunning the entire process, taking care to mark the points in the pattern as precisely as possible, and to not move the pattern at all from its original, engraved position.